How to Always Show Scroll Bars on macOS (Quick Guide)

If you’ve ever scrolled through a long list of files or documents on your Mac and wondered where the scroll bar went, you’re not alone. By default, macOS hides scroll bars until you start scrolling, which can make it hard to tell if there’s more content below. This is especially frustrating when you’re scanning through long lists or managing files, where you need clear visual indicators of scrollable areas.
I’m going to show you how to make scroll bars always visible on macOS, so you never have to guess whether there’s more content to see. These instructions work on macOS 15 Sequoia and later, including the current macOS 26 Tahoe.
Quick Steps to Show Scroll Bars Always
Here’s the fastest way to make scroll bars permanently visible:
- Open System Settings from your menu bar or Dock
- Click Appearance in the sidebar
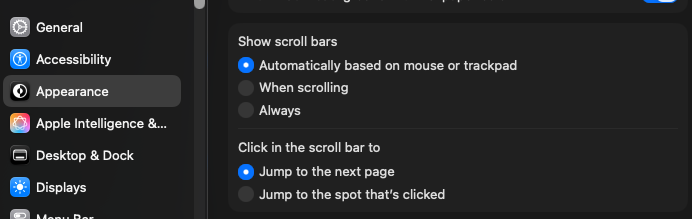
- Under “Show scroll bars,” select Always
- Close System Settings (changes apply immediately)
That’s it. Your scroll bars will now stay visible in all apps that respect system settings.
Understanding Your Scroll Bar Options
When you open the Appearance settings, you’ll see three options for scroll bar visibility. Here’s what each one does:
Automatically based on mouse or trackpad: This is the default setting. macOS shows scroll bars only when you’re using a mouse, and hides them when you’re using a trackpad. The system assumes trackpad users prefer gestures over visual indicators.
When scrolling: Scroll bars appear temporarily when you scroll, then fade away after a few seconds. This gives you a brief visual reference without cluttering your screen.
Always: Scroll bars stay visible at all times, just like they did in older versions of macOS. This is the most predictable option and helps you quickly identify scrollable areas.
For most people, the “Always” setting provides the clearest visual feedback, especially when working with long documents or file lists.
Using Terminal Commands (Alternative Method)
If you prefer working in Terminal or need to apply this setting across multiple Macs, you can use this command:
defaults write -g AppleShowScrollBars -string AlwaysAfter running this command, you’ll need to log out and log back in (or restart your Mac) for the change to take effect in all apps.
To verify the setting was applied, you can check it with:
defaults read -g AppleShowScrollBarsThis should return “Always” if the setting is active.
Troubleshooting: When Settings Don’t Stick
Sometimes the scroll bar setting may not work as expected. Here are common issues and solutions:
Settings Revert After macOS Updates
Occasionally, macOS updates can reset appearance preferences to defaults. If this happens, simply go back to System Settings > Appearance and reselect “Always.” You can also rerun the Terminal command above.
Some Apps Don’t Show Scroll Bars
Certain third-party apps use custom scroll implementations and may not respect system-wide scroll bar settings. Apps like web browsers, code editors, and design tools sometimes have their own scroll bar preferences in their individual settings menus.
If an app isn’t showing scroll bars:
- Check the app’s own preferences for scroll bar or appearance settings
- Try quitting and relaunching the app after changing system settings
- Contact the app developer if scroll bars remain hidden
Changes Don’t Apply Immediately
While most apps pick up the new setting right away, some may need to be relaunched. If you changed the setting using Terminal, you’ll definitely need to log out and back in for changes to take full effect across all apps.
Why Always-Visible Scroll Bars Matter
Beyond personal preference, there are practical reasons to keep scroll bars visible:
Better spatial awareness: You can instantly see how much content exists in a window and where you are in the document. This is particularly helpful when reviewing long lists or navigating through large folders.
Accessibility: For users with motor control challenges, visible scroll bars provide a larger, more predictable target for clicking and dragging compared to gesture-based scrolling.
Precision navigation: The scroll bar thumb (the draggable part) lets you jump to specific sections quickly, which is faster than scrolling through hundreds of items one screen at a time.
Visual consistency: If you’re used to how scroll bars worked in older macOS versions or other operating systems, always-visible scroll bars provide a familiar interface.
Making the Most of Your Mac
Now that your scroll bars are always visible, you’ll find it easier to navigate through content and identify scrollable areas at a glance. This small change can make a noticeable difference in your daily workflow, especially when working with file management tasks or reviewing long documents.
If you’re looking for more ways to optimize your Mac experience, I recommend exploring other System Settings > Appearance options. You can customize accent colors, highlight colors, sidebar icon size, and more to create an interface that works best for you.
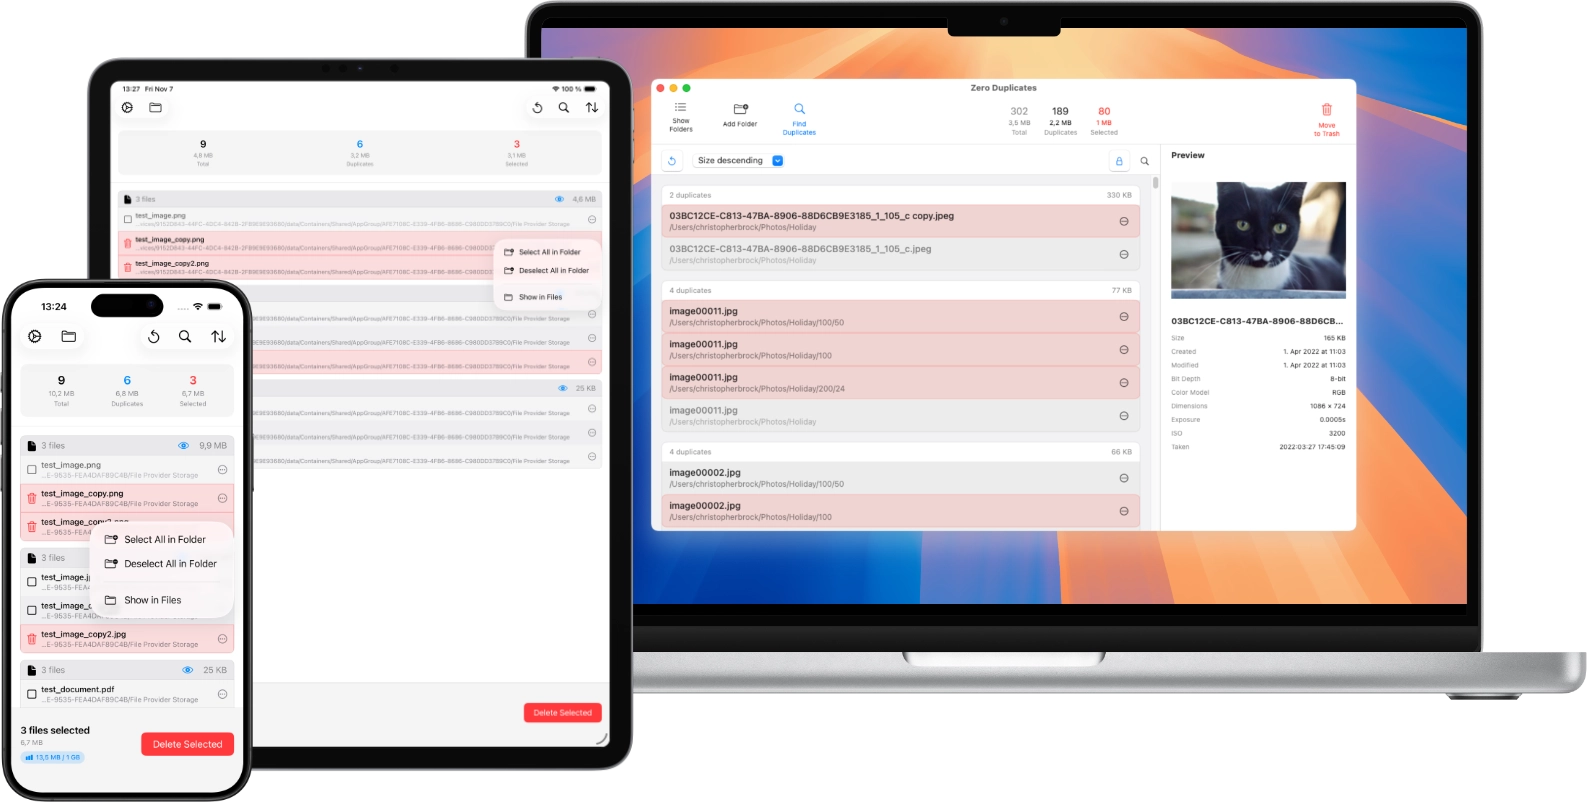
For other Mac maintenance tips, check out my guide on how duplicate files slow down your Mac and why removing them is one of the most effective things you can do for performance. You might also find it useful to set up automatic trash emptying so deleted files don’t quietly pile up. If you want an easy way to find and remove duplicate files, Zero Duplicates is the app I built for exactly that.
Remember, these settings are personal preferences. If you find that always-visible scroll bars feel cluttered after trying them for a while, you can always switch back to “When scrolling” or “Automatically” using the same steps above.